Preserve Your Shirt
The latest Brief we have been given is a group brief, following last weeks research we were put into groups and had to make a decision on what how to, to carry on with. We decided to change Andy's How to Iron a Shirt, to How to look after or preserve your shirt.
We decided to aim to topic at young professionals, as we would expect rich business men to just get everything dry cleaned and bought new where as a young professional will have to look after his shirts. He will consider:
- Washing
- Drying
- Ironing
- Storing
We considered different ways of presenting the information, but felt a tag would work quite well, seen as they are on every shirt already. We thought this would be the most efficient way of conveying the message but we will have to look at how we can fit allot of information on a small tag...Fold out?
Shirt Research
Ironing
• Begin to iron your dress shirt by beginning with the underside of the collar. Smooth away from the collar points towards the back of the neck. Continue by ironing the front of the collar.
• Next, iron the yoke area from the neck outwards, and then iron the pleats in the same direction of the fold.
• Iron the cuffs of your shirt inside out as well. Put the sleeves down flat and iron upwards toward the shoulders.
• Don’t forget to iron the other side of the shirt sleeve before moving on to the next sleeve!
• Iron the body of your shirt by starting at the top and moving downwards towards the hem.
Tips to Extend the Life of Your Dress Shirts
• Ironing your shirt: Check for stains before you begin to press your shirt. It must be clean, or you will set the stain into the fabric. To remove stains such as ink, you can purchase an over-the-counter ink stain remover or use a home remedy such as rubbing alcohol. Remove red wine stains by pouring white wine over the mark and laundering again.
• If you don’t have good quality steam iron, you should try to iron your shirt when the fabric is damp. You can press it far more easily to remove all wrinkles, and it’s less likely that you will damage your shirt in any way.
• Spray your cologne on your body instead of on your shirts. Wait for it to dry before dressing, as cologne can stain your shirt permanently over time.
• Check dress shirts occasionally for damage or needed repairs. Keep your eyes open for loose threads and buttons.
Storing
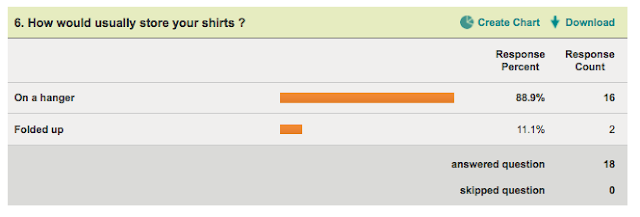
• Hang your dress shirt on a supportive hanger such as a wooden one or a thicker plastic one. If the hanger has firm shoulders, it will prevent unsightly bumps. Wire hangers are not recommended for your shirts.
• If you store your shirts from season to season, be sure to have them washed before packing them away. Store them in a plastic case to prevent insects and odors from reaching your dress shirts during storage.
Shirt Life Span
The industry standard, as backed by the Drycleaning & Laundry Institute and the Better Business Bureau, is that a shirt's expected life span can't really be guaranteed beyond two years if you're wearing the shirt regularly. But that's not a great measuring stick - you might have shirts you wear almost every week and then others you only wear once every couple of months. A more precise standard than calendar time is the number of times a shirt is washed - in which case the expected life span of a shirt should be somewhere between 35 and 50 washings. Even that standard is going to fluctuate based on certain conditions, like how much abrasion or friction you're subjecting the shirt to, how much strain is placed on the shirt (if a shirt is tight and you're stretching it out regularly in parts), and the stains that may develop on an item, even if that item is washed shortly thereafter.
1- Limit your dry cleaning
It's not a myth; dry-cleaning your clothes too often isn't a good idea. Blame it on the chemicals used in the process, which can cause the fabric to deteriorate and lose its shape in the long run. Instead, spot clean your suits by hand -- using water and mild soap -- and have them professionally steamed and pressed when needed. 2- Machine-wash & hand-press your dress shirts
The same rule applies to cotton dress shirts; if you can't afford to buy new shirts every year, then you shouldn't have them dry-cleaned too often because they'll deteriorate and lose their luster real quick. Machine-wash and hang them to dry instead. Furthermore, when you do take your shirts to the dry cleaner, make sure they're hand-pressed rather than machine-pressed. It will help keep the seams, collars and cuffs looking great, longer.
Note: There is an exception when it comes to machine-washing shirts; dark colored dress shirts should be dry-cleaned in order to prevent fading and discoloring.
3- Leave your bottom button undone
Ever wonder which buttons on your three-button suit should be fastened and which ones shouldn't? If so, you're not alone -- I get that question all the time. When wearing a three-button suit, never fasten your bottom button, no matter what type of suit it is. As a general rule, you should always fasten your top button, except if your suit features soft, rollover lapels. In that case, it's okay to keep the top and bottom button unfastened for a more relaxed look.
4- Iron your cotton dress shirt
The key to properly pressing your cotton dress shirts is to crank up your iron's heat to its maximum level. And in order to avoid burning your shirt, fill up the iron with water (for steam) and use a spray bottle to moisten the shirt prior to ironing.
6- Get rid of wrinkles quickly
If you're running late for work in the morning and don't have time to iron your shirt meticulously, then simply iron the cuffs, collar and front part of your shirt. The rest of your shirt will be covered once you slip on your jacket. But this is a last resort; if you have a bunch of other shirts to wear with your suit, then wear one of those instead, until you have time to do a real ironing job.
Before washing, make sure you undo all the buttons. This will reduce the strain on the stitches holding the buttons in place.
It’s also important to remove the collar stays before washing. This will avoid uneven wear on the collar points. It also saves you from trying to find them in the drum after washing. (Collar stays should be removed before sending shirts to the dry cleaners).
When washing, make sure you turn all shirts inside out. This not only protects the mother of pearl buttons from chipping on the steel drum, but enables the soap powder to work directly on under-arm stains.
Wash in water at a temperature of 40°C to 60°C (104°F to 140°F), making sure you first read the washing instructions on the label.
We ask you to think climate and recommend a lower wash temp 30°C
After washing is completed, dry the shirt either on a line or in an airing cupboard. This will prolong the life of the shirt. Do not tumble dry as the steel drum tends to wear out the points on the collar and cuffs.
Note: All good quality cottons will shrink approximately 2 1/2" during the first few washes. We take this into account by making our collars 1/2 inch larger and our sleeves 7/8 inch longer than their stated size.
Clothing Labels
As all shirts come with a tag already on we have decided to included all our information on a tag, I have researched some tags that I like to start off. This might give us a better clue of where to start off.
Thomas Selway
I like the look of black and white, its simple and sofisticated
Danielle Clough
I like the idea of cutting shapes from tags, maybe cut a shirt shape out of our tags with the information behind?
Ryan Jacobs
this set of tags looks really great, I like the simple use of shapes and colour
Stacy Nesbitt
Nice vintage photography, gives a classy feel, appealing to young professionals
I like the ides of incorpoting a origonal shapes into the booklet.
SHN Mood Booklet
Clever Deisgn work here.
Harry Nesbitt
Andys Designs
Here are some Designs Andy has Come up with:
I like where Andy is going with this, I do feel the tag/booklet needs to be bigger and but more compact so we can fit more information on it but I like his initial ideas.