The Machine
- The rotary press was invented in the mid-1800s by Robert March Hoe. While rotary presses have evolved somewhat to accommodate automation through electricity, the core machine remains more or less unchanged. The typical rotary press functions by passing a substrate (the material to be printed onto) between two rotating drums. One of the drums will be partially submerged in a large inkwell. This drum will have the image to be applied to the substrate curved over its surface, either on a specialized plate or the drum itself will be engraved with the image. As the drum turns toward the substrate, its surface is scraped by a doctor blade. The function of doctor blade is to ensure that excess ink does not reach the substrate. At the point of contact between the substrate and the inked image, the second drum or impression cylinder presses the paper against the inked drum, creating the image transfer. Rotary printing presses are used to do three main types of printing: rotogravure, flexography and offset printing.
Rotogravure
- Rotogravure printing is the most direct form of rotary printing. This process makes use of copper cylinders that are partially immersed in ink wells. The cylinder itself is engraved through etching, forming a multitude of small impressions in the cylinder. These impressions are filled with ink as the cylinder rotates in the inkwell and then the ink is transferred onto the substrate as it passes between the etched cylinder and the impression cylinder. This process can be used to create color images by using several etched cylinders immersed in different ink colours, though the ink must be dried between color applications.Because cells of different depths can hold varying amounts of ink, the rotogravure process can print a rich, full range of tonal values, making it ideal for reproducing photographs and other continuous-tone copy in large quantities. Rotogravure is thus widely used to print newspaper supplements (e.g.,colour magazine sections), catalogues, illustrated magazines and books, advertising, calendars, and so on. It is also employed for printing labels and wrappers on cellophane and similar materials. A high-speed printing process, rotogravure is best used for printing long runs of material bearing black-and-white or colour illustrations.
- Flexography
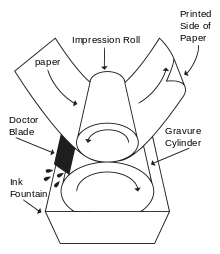
 Flexography, also referred to as flexo, typically uses flexographic plates to accomplish the image transfer onto the substrate. The plates are created using a number of methods, but the end result is the same: a plastic or rubber plate, with the desired image in a mirrored, raised relief. The flexography process employs a three-roller system rather than a two-roller system. One roller is partially immersed in the inkwell. This transfers ink to the raised surfaces of the plate, which is wrapped around its own cylinder. The plate is scraped by the doctor blade. The substrate is then passed between the plate cylinder and the impression cylinder, effecting the ink transfer from the plate to the substrate. Publication flexography is used mainly in the production of newspaper, comics, directories, newspaper inserts, and catalogs. Packaging flexography is used for the production of folding cartons, labels, and packaging materials. Large quantities of inks are used during normal runs on flexographic presses; however, some printers are able to recycle a majority of their spent inks and wash waters. Major chemicals used in flexography include platemaking solution, water and solvent based inks, and blanket/roller cleaning solvents.
 Offset Printing
- Offset printing is a more complex process that shares as much with lithography as with rotary printing. In this process, a lithographic plate is used on the plate cylinder. As the plate cylinder rotates, water is applied to the plate and then ink is applied. The lithographic plate is treated in such a way that water will be attracted to the areas of the plate where no image should be printed. This water will repel the ink in those areas. The image portion of the plate is treated to repel water and only the ink will stick to it. The ink image is transferred onto an offset cylinder, which is typically made of rubber. The rubber picks up the ink. The substrate is then pressed between the offset cylinder and an impression cylinder where the ink is transferred to the substrate.
The Digital Printing Revolution...
Since the computer revolution changed the way we live and work I am sure that most of us are aware of its effects, but how many people realise how computers are revolutionising the printing industry? This revolution is called Digital Printing.The History of Printing...
 In the 1400’s when Gutenberg developed the first printing press it was slow and expensive to print anything. Even then people were clamoring for a way to quickly and inexpensively produce short-run printed material. The ability to print four-color short-run material was next to impossible to do before the merging of old technology, the printing press, and new technology, computers. This marriage created a new and exciting area of printing, Digital Printing Technology.
A New Era...
Digital printing has caused a paradigm shift in the printing world; making the impossible, possible. It brought with it the exact solution that many print customers needed and offered a viable printing option that now the industry wouldn’t dream of doing without.Analogue Printing
Before we delve into what digital printing is lets take a moment to look at Analog printing technology to better help us understand the differences. Traditional printing is an analog technology. Analog is defined as a continuously varying event such as sound or pressure, while a digital signal is either on or off, thus making it a more predictable. Analog printing methods reproduce images by creating a copy or an “analogous” image.Lithography uses analogous images on plates to transfer ink to print substrates. Screen printing employs film positives and negative stencils which resemble the original image to create prints. Gravure, Flexography, etching, and other analog print methods utilize other forms of analogous image transfer. All of these methods reproduce images from a primary image.
How Digital Printing Works
 Digital Printing takes a different approach assembling each image from a complex set numbers and mathematical formulas. These images are captured from a matrix of dots, generally called pixels, this process is called digitizing. The digitized image is then used to digitally controlled deposition of ink, toner or exposure to electromagnetic energy, such as light, to reproduce images. The mathematical formulas also allow for algorithms to compress the data. It also give a method of Calibration or Color Management Systems which helps to keep images looking the same color despite where they are view or printed. One important function that the mathematical formulas allowed was the development of a common language for digital printing it is called PostScript and was developed by Adobe. To see what PostScript looks like open a PDF or EPS in a text editor, the code seems very intricate but to a computer it just a simple code of instructions.
One of the most important advantages that Digital printing offers is a quicker response time due to its minimal press setup and it’s built in multicolor registration system. This eliminates many of the upfront, time consuming processes that can cause analog printing methods to have a slower turn-around time. Another advantage of Digital printing is the ability of offer variable printing; this means that each printed piece can have different information on it providing personalization and customization unmatched by analog processes.
The Advantages of Digital Printing
Digital printing technologies give the designer more options of substrates to print on due to its non-contact printing. This eliminates the distortion of images that occurs in analog process, like screen printing. It also requires less harsh methods of holding the substrate in the press, thereby giving more options of substrates. This means that substrates such as fabrics, very thin paper, and even ceramics can be safely printed on offering the customer more choices in designing.
The market is driving the desire for digital printing and therefore pushing it’s development and adoption. Print buyers want to eliminate the risks and expenses of maintaining inventory. Mass and Batch printing runs are giving way to the digital printer’s ability to have shorter print runs, mass customization, and less turn-around time.
Digital printing best serves the demand for: variable data printing, personalization, customization, less spoilage, faster proof cycle, smaller archival storage, quick response, just-in-time delivery, and short to medium print runs. While printers are still employing analog print methods they have the ability, with digital printing, to offer their customers more options and provide better service.
http://www.facemediagroup.co.uk/?page=what-is-digital-printing
Pad Printing

The key elements to the padprinting process are the pad, the cliche', and the ink. Each of these elements are explained in greater detail in subsequent articles also found on this site. Together, these three elements allow more flexibilty in the types of products which can be printed using this process, than any other printing process.
The basic steps as illustrated below are as follows:
- The cliche' step - the image on the cliche' is inked via doktor blade sytern or inkcup while the pad travels to the image.
- The transfer step - the pad picks up the inked image from the diche' and travels to the subsbate.
- The print step - the pad makes contact with the substrate using just the right amount of pressure to deliver the image.
The Cliche
 The desired image to print is etched into a plate called a diche. The cliche is usualIy made of a polymer coating on a metal backing or of hardened steel. Once placed on the printer, the cliche is inked by either an open inkwell doktoring system or by a ctosed inkcup sliding across the image. The differences between cliche' types and how to chose the right type is explained in greater detail in the article titled Selectina the. Correct clicher for your Pad Printing Job by Julian Joffe. In this article you'll also learn how the cliche controls the how much ink is applied to the product.
The Ink
Padprintjng inks are just as versatile as the other elements in the process. Not only are they available in every color imagineable, they also come in a variety of series which are specific to the type of substrate to be printed on. Different materials react differently to the various elements in inks. For example, the ink used for printing on certain plastics may not adhere to glass or aluminum. There are medical grade inks for use in the medical industry, as well as edible inks which can be pad printed onto candies or other food products. As you'll read in the article Understandina and USina Pad.Pri~tina1 hks by Peter Kjddell, final appearance and adhesion quality is dependant on other factors such as the viscosity and evaporation characteristics of the ink.The Pad
After the cliche' is inked, the silicon pad then picks up the image and transfers it to the product. The pads are made of a silicon material which can vary in durometer (hardness). The properties of the silicon allow the inks to temporarily stick to the pad, yet fully release from the pad when it comes into contact with the product to be printed. The durometer of the pad dictates how the image molds to the product. For example, to print an image on a basketball, a harder pad will get more of the image into the textured surface. Likewise, a larger image to be placed on a flat (or nearly flat) surface would normally require a substantial amount of down pressure to print the entire image with a hard pad. By using a softer durometer, the image can be placed using less pressure and thus avoiding some complicatiorts associated with too much pressure. For more information on the pad see the article titled Understanding the Pad in Pad Printing.Advantages and Benefits of Pad Printing:
|
Screen Printing
What is Screen Printing?
Screen printing (also known as silk screening) is one of the oldest methods of printmaking, with examples dating back to the Song Dynasty in China. The process involves creating a stencil of an image on a screen of porous mesh, traditionally made of silk. A roller or squeegee is used to pull paint-like ink over the stencil, forcing it through the mesh onto the paper being printed. Unlike the inks used in some other forms of printing, screen printing ink sits right on the surface of paper, resulting in incredibly rich, vibrant color.
The Printing Process
The screen printing process has multiple steps, starting with the process of creating the screen.
Like most hand-printing methods, screen printing has a very distinctive look. Even though the surface is flat, the velvety finish and extreme vibrancy of the ink cannot be replicated with any other technique. Screen printing can also be used on a variety of surfaces, so anything that has a flat surface can be printed; paper, chip board, fabrics, wood, leather and metal are all viable candidates!
Like any other printing process, screen printing definitely has specific limitations, which makes it better suited for some projects (and not so well suited for others). Fine details or delicate text can be lost or broken up in the printing process, and large blocks of text can be difficult to print consistently. Light ink on dark paper works beautifully, but textured papers are out. Thin papers also present difficulty, as the ink could cause them to buckle or warp.
http://ohsobeautifulpaper.com/2011/04/the-printing-process-screen-printing/
Screen printing (also known as silk screening) is one of the oldest methods of printmaking, with examples dating back to the Song Dynasty in China. The process involves creating a stencil of an image on a screen of porous mesh, traditionally made of silk. A roller or squeegee is used to pull paint-like ink over the stencil, forcing it through the mesh onto the paper being printed. Unlike the inks used in some other forms of printing, screen printing ink sits right on the surface of paper, resulting in incredibly rich, vibrant color.
The Printing Process
The screen printing process has multiple steps, starting with the process of creating the screen.
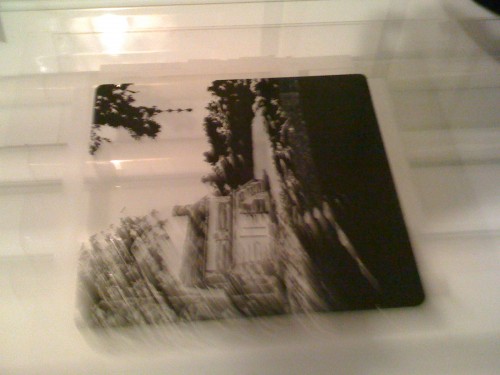
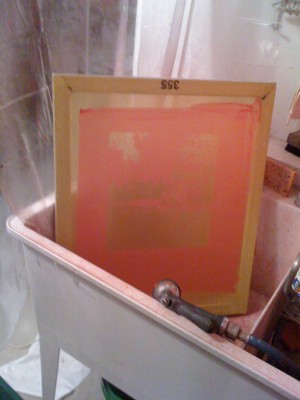
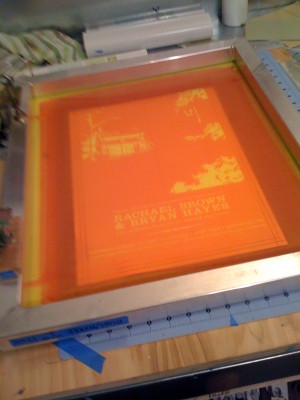
The screens are coated with a light sensitive emulsion, and exposed using a positive image. Your positive can be created in a variety of ways, from digitally printed film, hand-cut rubylith, or hand drawn with ink on acetate. The positive is positioned directly on the surface of the light table, and the screen placed over the positive, print side down. The emulsion hardens when exposed to light, and remains soft and water-soluble where the positive blocks the light. After exposure, we take the screen to the wash-out sink, and rinse away the soft emulsion. Once the screen has dried completely, we lock the screen into hinges that are mounted onto our print surface.
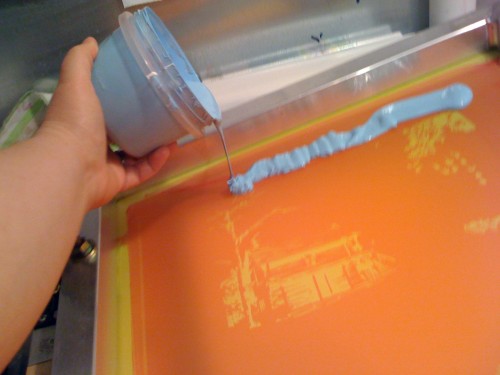
We align the paper for printing, and mark the location with registration tabs. Ink is applied directly to one end of the screen in a long bead, ready to be pulled over the screen with the squeegee.
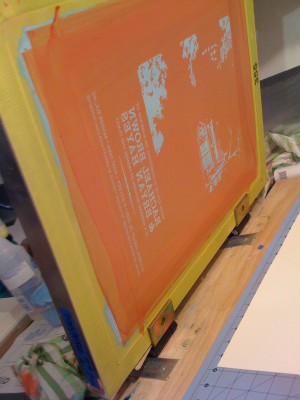
A nice, firm pass with the squeegee forces ink through the mesh, visibly showing on the print side of the screen. The screen is lowered on the hinges, and the squeegee is used to press the inked mesh flat against the paper, transferring a thin, even layer of ink to the page.
The amount of ink transferred to the paper is controlled by the thickness of the emulsion, so crisp images need a fine, even coat of emulsion to maintain their detail.
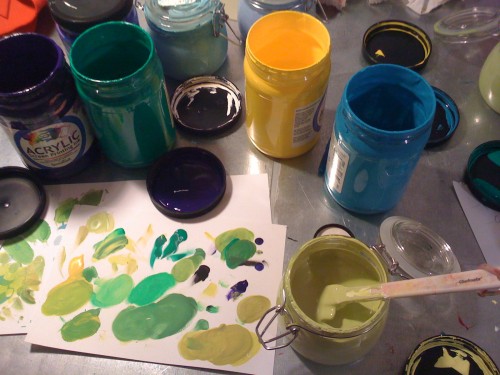
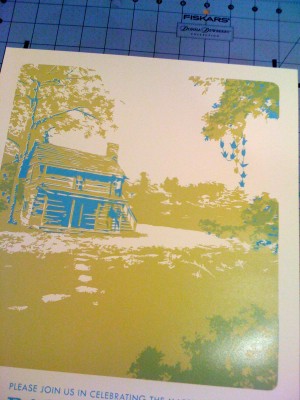
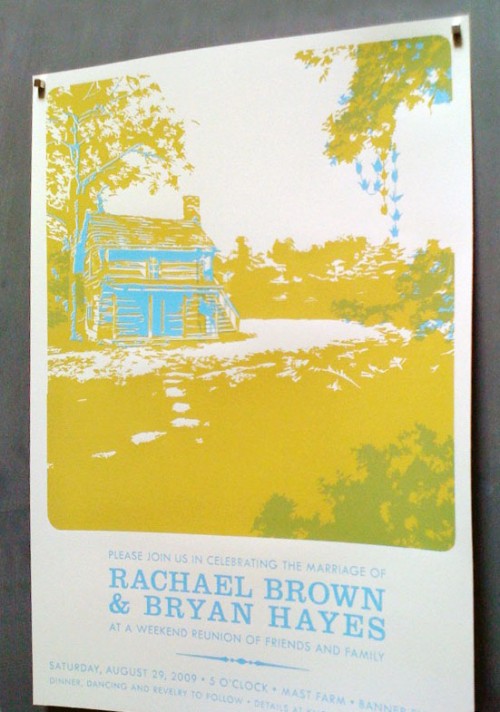
Mixing the second color for this particular job was a challenge; we wanted to create the illusion of a 3rd color in the print, so the second ink needed to be transparent and overlay the first color to create a pleasing effect. We settled on a yellowish green that would create a darker green where it overlapped the blue.
Registration was tight! The blue and yellow-green had to line up perfectly along the sides of the image.
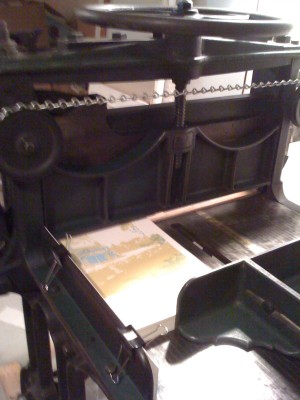
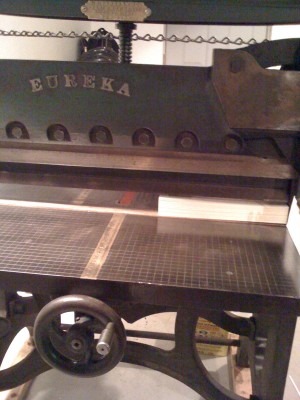
Printing finally completed, it’s time to cut! Our cutter, Cooper, was made in 1867, and still works like a charm.
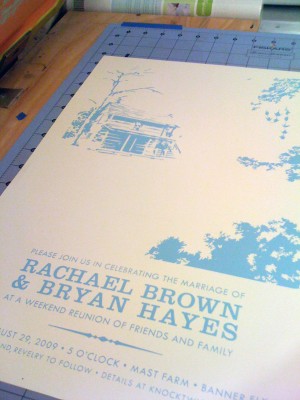
The final piece; poster sized invite, ready to be rolled into tubes and mailed to guests!
Tips and AdviceLike most hand-printing methods, screen printing has a very distinctive look. Even though the surface is flat, the velvety finish and extreme vibrancy of the ink cannot be replicated with any other technique. Screen printing can also be used on a variety of surfaces, so anything that has a flat surface can be printed; paper, chip board, fabrics, wood, leather and metal are all viable candidates!
Like any other printing process, screen printing definitely has specific limitations, which makes it better suited for some projects (and not so well suited for others). Fine details or delicate text can be lost or broken up in the printing process, and large blocks of text can be difficult to print consistently. Light ink on dark paper works beautifully, but textured papers are out. Thin papers also present difficulty, as the ink could cause them to buckle or warp.
http://ohsobeautifulpaper.com/2011/04/the-printing-process-screen-printing/


No comments:
Post a Comment